It’s the time of year for saving money!
In last week’s article, we covered speaker placement and room dimensions. In this installment, we will delve into simple acoustic treatments already available, or easily created on your own.
 The primary objective with room acoustics is maximizing your signal-to-noise ratio. Signal is what you hear directly from the speakers. Noise is every reflection, flutter echo, or resonance that the room boundaries create.
Let’s begin with the floor. Sound tends to be stored in a room between the two largest parallel surfaces. Unless you have extremely high ceilings, this will be between the floor and the ceiling. If you have both a hard-surfaced ceiling and hard-surfaced floor, you will notice a long reverb time in the room. Reverberation is simply a series of echos, the sound hitting a surface and then reflecting back to you.
This echo effect can be demonstrated in a large outdoor area such as a school playground. Stand facing a wall with nothing to your right, your left, or behind you. If you shout at the wall it will sound normal. Take ten steps back and try it again. Still normal. Keep moving back, and eventually you will hear a distinct echo. The farther you go, the longer the delay time in the echo. In a recording studio, this is referred to as slapback echo. You hear the original sound, then the second sound slightly lower in volume. If you enclose the space so there are walls all around you, the echo now is bouncing everywhere. If all surfaces are hard, the sound continues to bounce around with no distinct echo because there are literally hundreds of reflections.
Think about the sound in a parking garage, or gymnasium. In a smaller room, like in a house, the delay time is shorter, but those reflections still exist. The first, and easiest way to control reverb is to add carpet. This dampens the sound stored from floor to ceiling. If you have a hard floor, you will get similar results with a rug between you and the speakers.
 The next thing to look at is the reflection that hits the walls on either side of the listener. If you have a basic rectangular shaped room, as described in the previous article, you will want to tame the reflections on the side walls to improve stereo imaging, which is the ability to distinguish the separation of space in different parts of music, or where the musicians are placed on the sound stage.
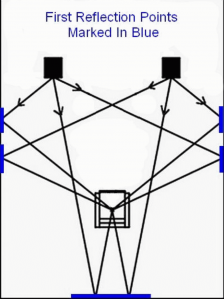
There are two reflections on each side wall. The first is from the speaker closest to the wall. The other is from the speaker opposite the wall. As you can see in Figure #1, there are two distinct spots that need to be tamped down to tame those reflections. The reflection of the left side speaker to the right side wall and back to the listener is the most detrimental because it is sending left channel information into your right ear at a much longer time delay than the information is reaching your left ear. This destroys the stereo imaging. If these reflections aren’t mitigated, the recording will not have an optimal feeling of space. It will either sound like instruments and voices are coming from random spaces, or it will sound like a mono recording.
Roger Waters’ CD Amused to Death is a popular recording to get precise stereo imaging in a room. It’s use of phase matrixing during the mix process gives the illusion of sounds coming from very distinct places. If the room is not properly treated, the effect falls apart.
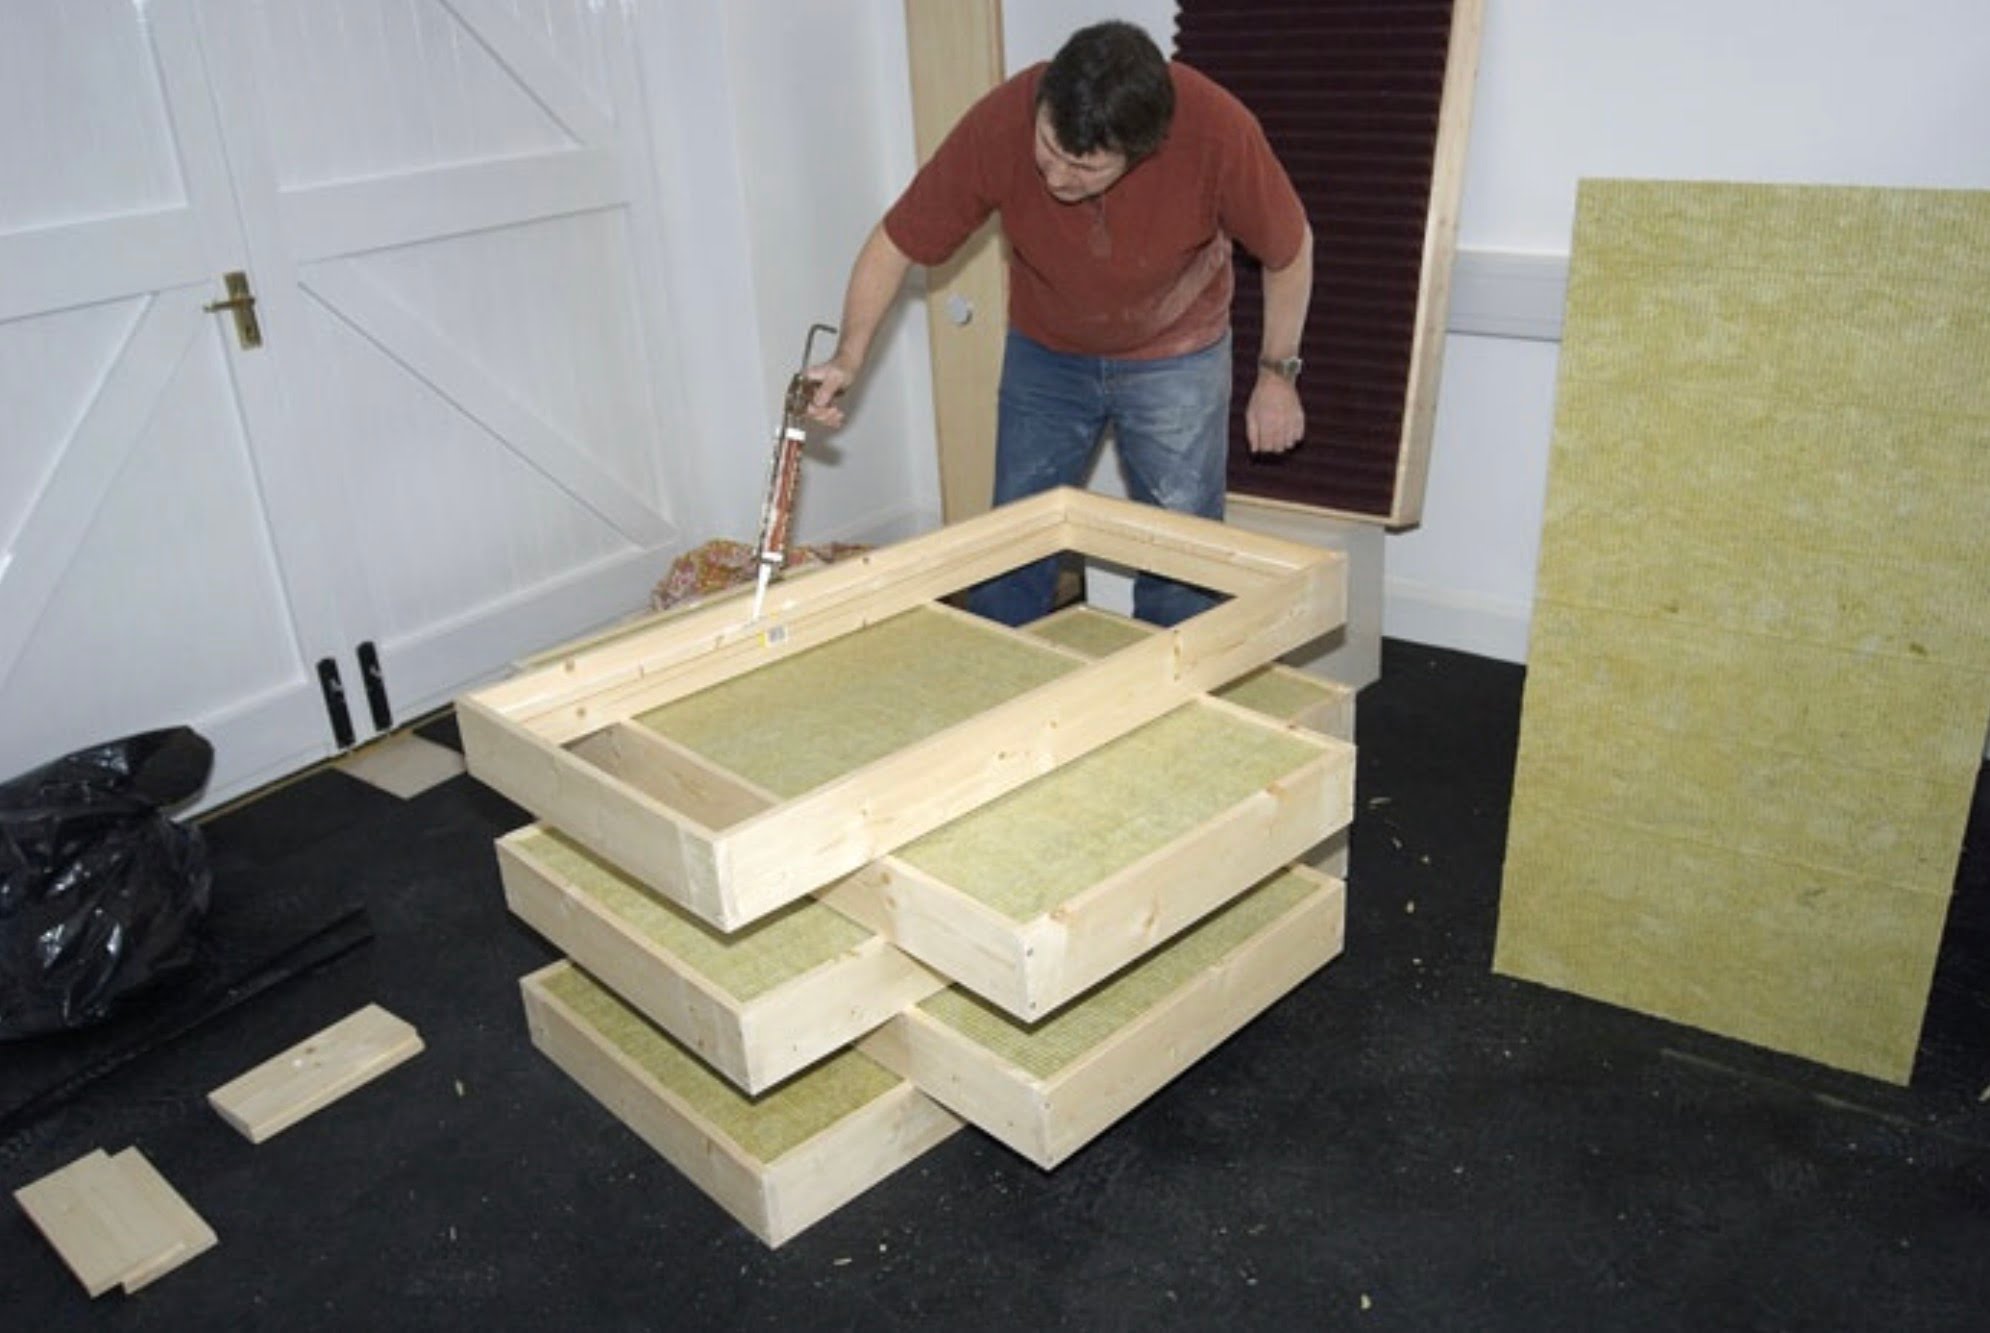
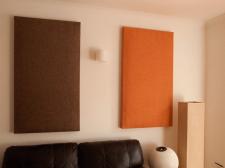
There are several things you can do to tame unwanted reflections. The simplest is to hang a tapestry that will absorb the high frequency bouncing in these spots. Try to get something fairly heavy that will work lower into the frequency range. An even better way to tame reflections is a fiberglass or foam panel that can be made at home or purchased inexpensively from a company specializing in room treatments. Fiberglass is more efficient than foam, can be made to look nicer, and lasts longer but requires an acoustically transparent fabric cover. The most popular is Guilford FR 701. Most acoustic treatment companies sell some sort of fiberglass panel.
 Diffusers are another popular remedy. Where panels work by absorbing, diffusers scatter without deadening the sound. They are usually made of made of wood, hard foam, or plastic. The original diffusers used in old recording studios were the ever-popular egg crates, or book shelves. I often suggested home studio owners line the back wall with book shelves, then go to garage sales and buy randomly sized books. It’s the best poor man’s diffuser money can buy, with the added benefit of reading material during down time.
My personal preference is a room treatment that consists of absorption on the side walls and diffusion on the rear walls, a mix of diffusion and absorption. Absorption panels are fairly easy to make; diffusers are a bit more complicated. Both Acoustic Sciences and RPG make products that specialize in absorption and diffusion in one device.
In the next article, we will go into depth on flutter echo and bass resonance.
Christopher Klein has been designing and building high end acoustic treatments for listening rooms, studios, and home theatres since 1992. He has also been a professional musician since 1977.